Setting Up Group Accounts
One buyer, many members: corporate training, team licenses, classroom seats, family plans. The wrong shape for this is twenty-five individual memberships and a spreadsheet. The right shape is one group the organization owns, seats under it, and a dashboard where the owner manages their own people without ever emailing you.
This guide walks the whole life of a group account: selling it, provisioning it automatically from your CRM, handing it to the owner, and what the owner can do from there. It assumes you've read the Group Accounts module page for the concept; this is the setup.
The moving parts
Four objects, and keeping them straight makes everything else obvious:
- The group is the account the organization buys. It has an owner, a seat count (zero means unlimited), optional access tags, an optional end date, and a status.
- Members are people in seats. Each has a role: owner, manager, or member. Managers get limited control over their own team, which is how a department head runs their slice of a company-wide program.
- Teams are subdivisions inside a group. A company-wide group might have a Sales team and an Engineering team, each with its own seat allocation and manager. Teams are optional; a small group never needs them.
- Invitations are how new people get in without you creating them: the owner invites an email address, the recipient accepts, they're in a seat.
1. Decide what a seat is worth, and what it opens
Before any automation, two decisions.
Access tags. Group members don't get individual memberships; they inherit the group's access tags. Pick the local tags that define what a member of this organization can reach (see Tags & Memberships if the tag model is new to you). Every member of the group, including the owner, holds these tags while their membership is active.
Seats. The seat count is the contract: 25 seats means 25 active members. Zero means unlimited. Seats free up when members are removed or deactivated, and invitations are counted against availability, so you can't invite 30 people into 25 seats.
2. Provision the group from your CRM
The purchase automation in your CRM can create the group the moment it happens, with no human in the loop. Group Accounts registers four webhook operations:
| Operation | What it does |
|---|---|
create_group |
Creates the group owned by the webhook contact (or updates the matching existing group) |
update_group |
Changes attributes on every group the contact owns |
deactivate_group |
Suspends every group the contact owns; members lose access, pending invites revoked |
delete_group |
Hard-deletes every group the contact owns, with members and teams |
The create URL, same shape as every Torii webhook:
https://YOURSITE.com/?operation=create_group&membauth=YOUR_AUTH_KEYThe contact on the webhook becomes the owner. Torii finds them by CRM contact ID or email, so run create_member first if the buyer doesn't have a WordPress account yet.
The group's attributes (name, seats, end date, access tags, status) are resolved in order: URL parameter on the webhook call, then the CRM contact field you've mapped, then the operation default. For a fixed product like "Team License, 25 seats," put the values straight in the URL:
https://YOURSITE.com/?operation=create_group&name=Acme%20Corp&seats=25&access_tags=12,15&membauth=YOUR_AUTH_KEYFor products where the values vary by purchase, map CRM contact fields instead: under Group Accounts → Group Webhook Settings, map each attribute (name, seats, end date, access tags, status) to the contact field your automation fills at checkout. The webhook then carries whatever the contact's record says.
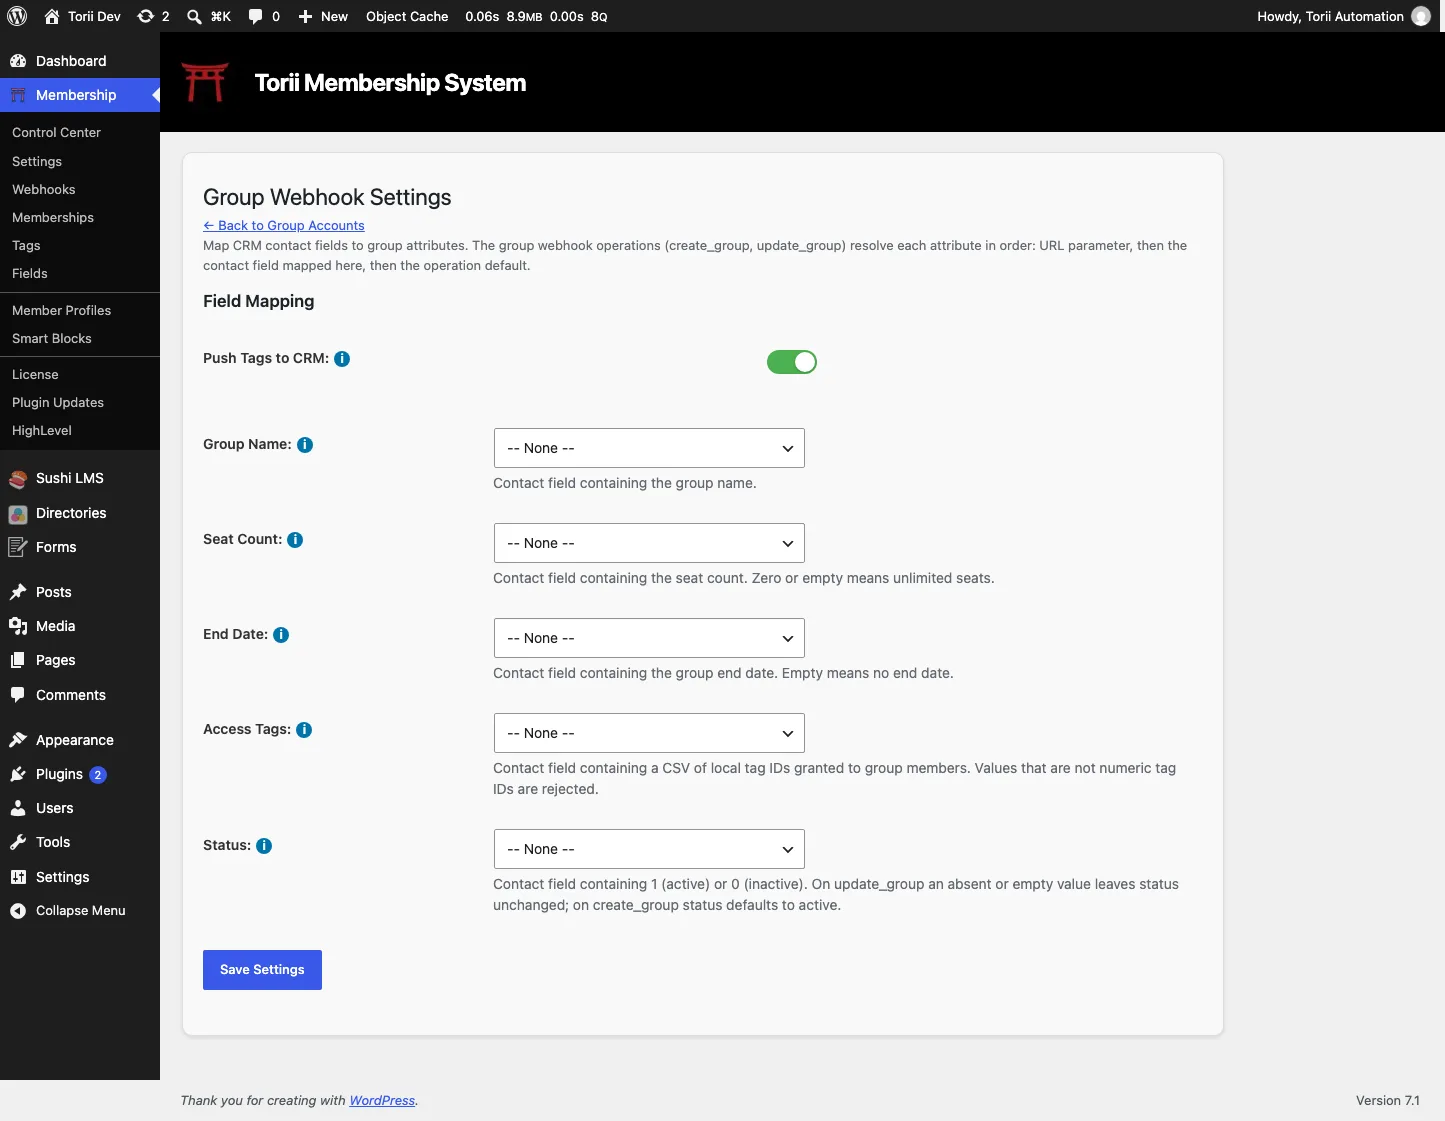
Details worth knowing:
- Creation is safe to retry. If the contact already owns an active group with the same name, that group is updated instead of duplicated. Your automation can fire twice without producing two groups.
- Validation is strict on purpose. Seats must be a non-negative number, access tags must be numeric local tag IDs, the status field must be 1 or 0, and end dates must be parseable and in the future. A malformed CRM field fails the webhook loudly (check the webhook log) rather than corrupting a group.
- Status semantics protect you. On update, an absent or empty status field leaves the group alone; a stale CRM value can't silently suspend or reactivate anyone.
3. Map the buyer's lifecycle to group operations
The rest of the CRM side is three automations:
- Purchase or renewal fires
create_group(with the seat count and access tags). - Upgrade or downgrade fires
update_groupwith the new seat count. Members beyond the new limit aren't kicked out, but no new activations happen until the group is back under its ceiling. - Cancellation or refund fires
deactivate_group. Everyone in the organization loses access at once, pending invitations are revoked, and the group survives as a record. If the customer returns,create_groupon the same name picks the group back up.
If you sell time-limited access (a cohort that runs for a quarter, a contract that ends in December), set an end date instead of scheduling a cancellation. Torii will automatically manage expiration itself, and when the date passes the group expires on its own: inactive, access closed, invitations revoked. One less thing to remember. If you find that you need to extend the period, just adjust the end date on the group.
4. Hand over the keys: the owner dashboard
The owner runs their group from a page you build once, out of shortcodes:
- [memb_group_dashboard] is the whole management interface in one pre-built shortcode: members, invitations, teams, seats.
- Or you can compose the pieces you want, in the order you want: [memb_group_invite_form] to invite by email, [memb_group_team_members] and [memb_group_team_manage] per team, [memb_group_notices] for success and error messages.
Protect the page with [memb_group_is_owner] so only the owner sees it, and put a link to it somewhere members can find. The shortcode reference lists all seventeen.
What the owner can do from the dashboard, with no involvement from you:
- Invite members by email address. The invitation carries a token and expires after seven days (expired invites are cleaned up daily). The recipient accepts, and lands in a seat.
- Add people in bulk with a CSV upload, up to 250 rows at a time. Existing users are added to the group directly; unknown emails receive invitations. The import respects the seat limit and reports what was added, invited, skipped, and why. The file format is covered in CSV Imports.
- Remove members, reassign their seat to someone new, resend an invitation that went astray, or revoke one.
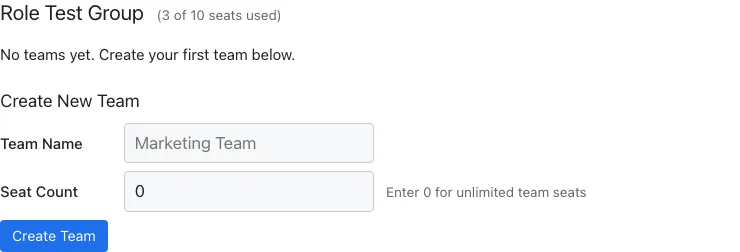
- Create teams with their own seat allocations, name a manager per team, and move members between teams. A team's seat allocation reserves part of the group's total; a team with zero allocated seats draws from the shared pool.
When an employee leaves the company, the owner removes them and invites the replacement. That's the whole support burden of a reassignment, and it's theirs, not yours.
5. Know the tagging model
Two tag families do different jobs, and mixing them up is the one real footgun.
Access tags (the group's access_tags) are local tags that grant site access. They're inherited by every active member, they're never pushed to your CRM, and they exist purely so the group's people can reach the group's content.
Membership marker tags are CRM-side labels: Group: {name} applied to every member including the owner, and Group: {name} Owner for the owner. They grant nothing on the site; they exist so your CRM can search, segment, and mail the organization (everyone in Acme Corp, every group owner). Local copies are always created; whether the definitions and per-contact tags are pushed to the CRM is a toggle on the Group Webhook Settings screen, and turning it back on backfills any groups created while it was off.
6. Test the whole flow
- Create a test contact in your CRM, or a test WordPress user, who is not an administrator. (Group webhooks refuse to operate on admin accounts, by design.)
- Fire
create_groupwith a name, a seat count of 2, and your access tags. - Check the group in the WordPress admin: owner, seats, tags, status all as sent.
- Log in as the owner and visit the dashboard page: invite an email you control, accept the invitation, confirm the new member appears and holds the access tags.
- Fire
update_groupwithseats=1and confirm no new activations are possible until a seat frees. - Fire
deactivate_groupand confirm every member loses access while the group and its history survive.
Every step leaves an entry in the webhook log and the event log, so a failure tells you where it happened.
Where to go next
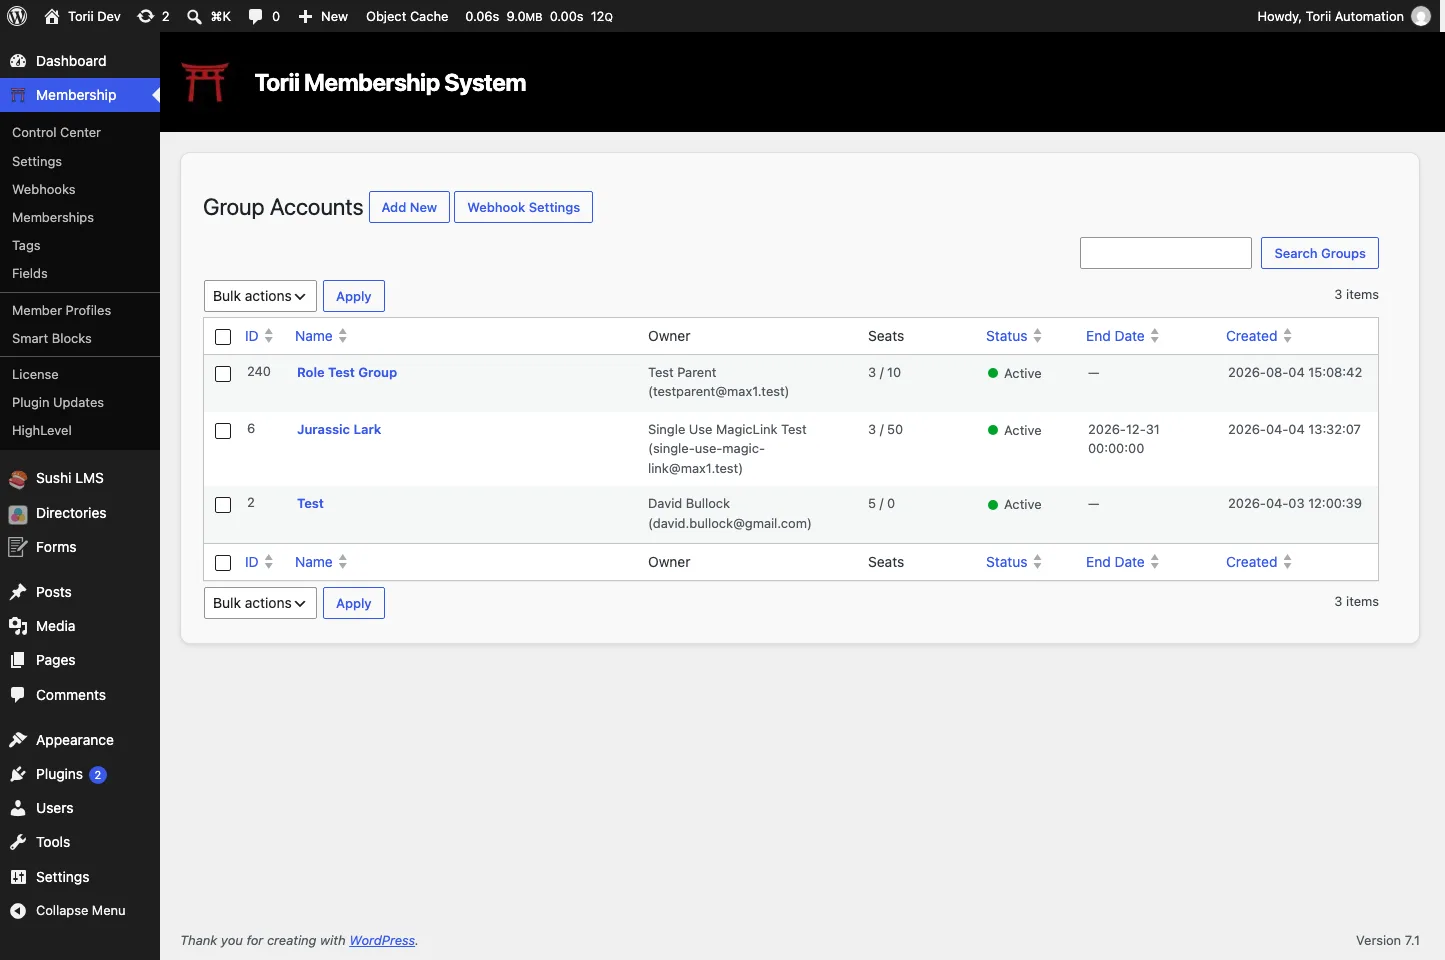
For the page-by-page building blocks, see the Group Accounts shortcodes and the module's shortcode pages. For selling to organizations without webhooks, groups can be created by hand in the WordPress admin too; the automation is a convenience, not a requirement.
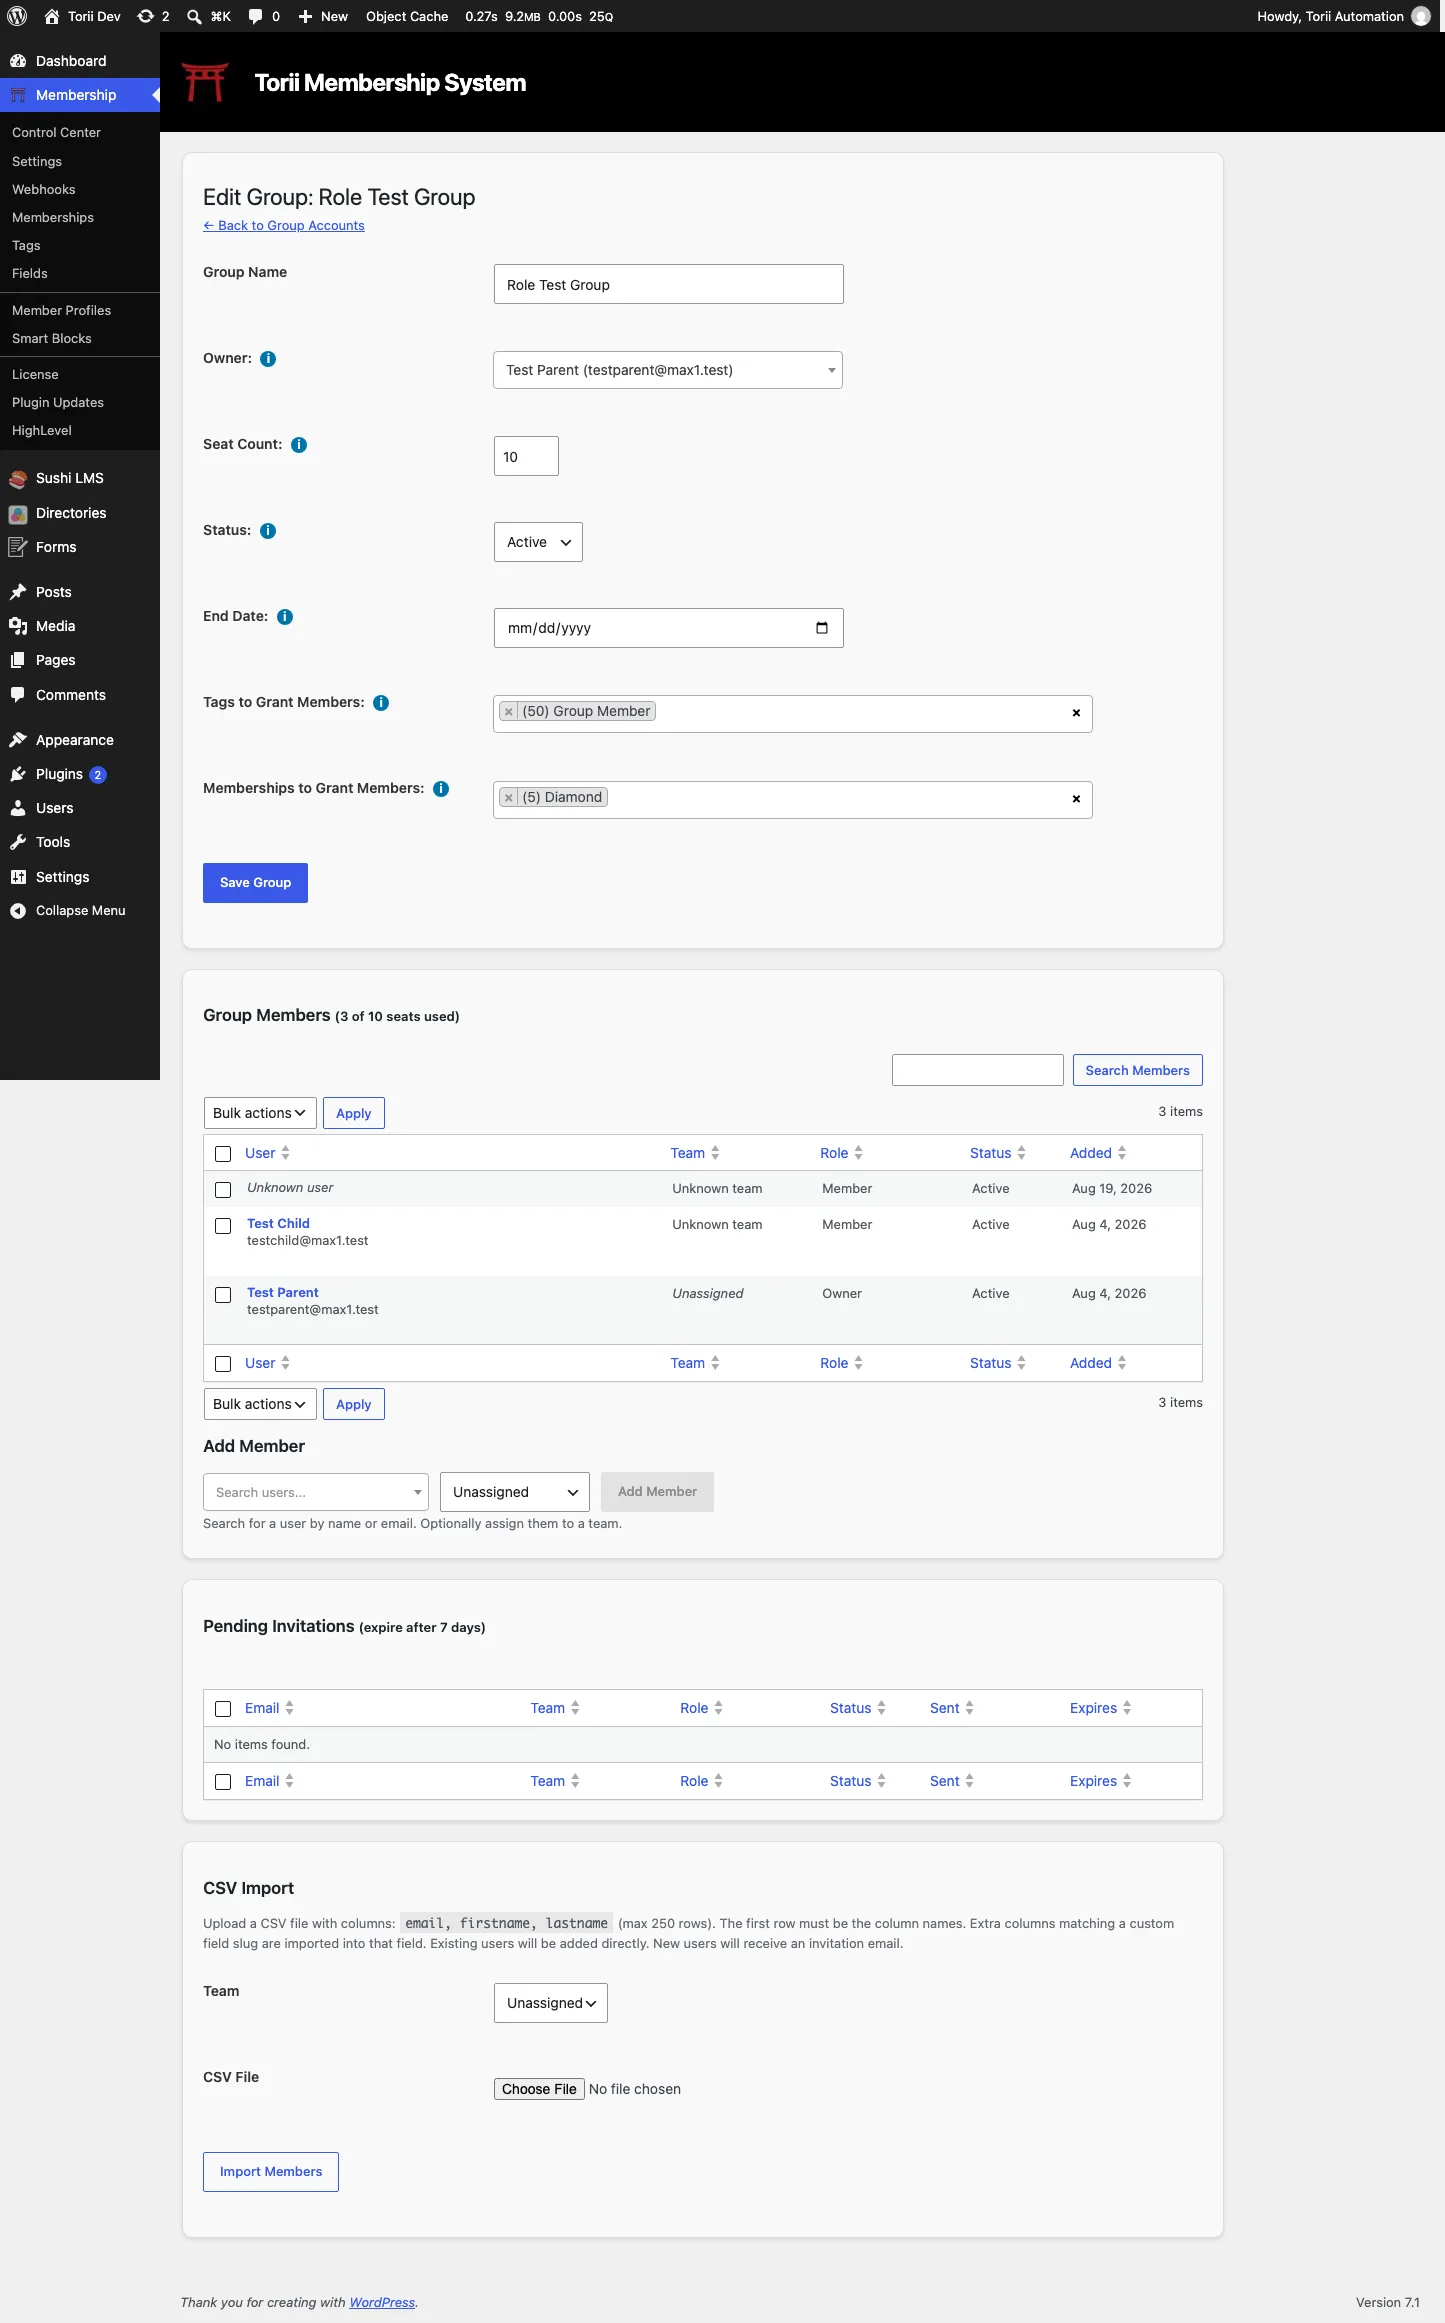
Opening a group shows everything in one place: owner, seat count, access tags, teams, and the member list.
And if your members are individuals rather than organizations, you don't need any of this: First Setup is the whole story.